Working with Topics
Topics are specific issues to be discussed in a Forum. For example, in a medical research Forum, a topic might be New Cancer Treatments. Topics can only be started within the Workarea.
Before creating a topic, you must create a Forum into which to place it. To learn more about how Topics fit into the Discussion Board hierarchy, see Hierarchy of Discussion Board Elements.
Adding a Topic to a Forum
When a new Topic is created, the first post is created from the message of the Topic.
To create a Topic, follow these steps.
Note: If the user adding the Topic is not a Forum moderator, that user does not see the Topic in the workarea until it is approved. See Also: Approving a Topic.
1. In the Workarea, click the Content tab.
2. Select a Discussion Board, then a Forum from the folder structure.
3. Click New Topic ( ).
).
4. The Post New Topic screen appears.
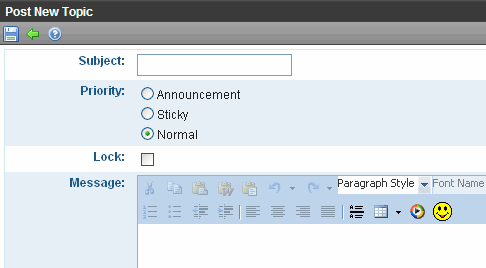
5. Complete the screen using the following table.
|
Field |
Description |
|
Subject |
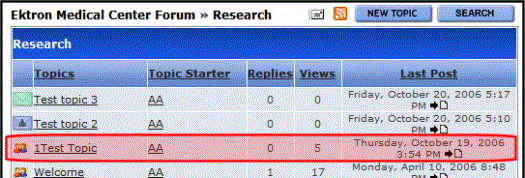
Enter a short description of the topic. The Topic Subject appears on the Forum page, as shown below.
|
|
Priority |
Set the priority level for the topic. This determines where the topic appears in the topic list on the site. The default setting is Normal. See Also: Setting and Changing the Topic Priority |
|
Lock |
Check this box if you want to prevent posting of replies to this Topic. You can do this temporarily or permanently. If a Topic is locked, only Administrator user group members can post to it, or edit or delete posts. Those users can post from the Web site or the Workarea. |
|
Message |
Enter the topic text. This text appears on a new Web page after a Web site visitor clicks a Topic’s Subject line.
|
6. Click Save ( ).
).
Setting and Changing the Topic Priority
You can set a topic’s priority when creating it. Within a Forum, topics are sorted by priority.
Anyone with Moderate permission can change a topic’s priority. To do so, edit a Forum’s properties and click View Properties (
Priority Levels
There are three priority levels:
Announcement - topic always appears at the top of the list. If a list has more than one announcement, they are sorted by date with most recent on the top.
The Announcement icon (![]() ) indicates its priority to the left of the title.
) indicates its priority to the left of the title.

Sticky - topic appears near the top of the list, just below the announcements. If a list has more than one sticky topic, they are sorted by date with most recent on the top.
The Sticky icon (
![]() ) indicates its priority to the left of the title.
) indicates its priority to the left of the title.

Normal - Topics with this priority follow Announcements and Sticky topics. The Normal icon (![]() ) next to the topic indicates its priority.
) next to the topic indicates its priority.
Locking a Topic
Locking a Forum Topic prevents users from posting a reply to the Topic. For example, you might create an announcement, but don’t want people replying to it. Or, you might feel as though a topic has had enough discussion and want to stop further replies.
If a Topic is locked, only Administrator user group members can post to it, or edit or delete posts. Those users can post from the Web site or the Workarea.
To lock a Topic, follow these steps.
1. In the Workarea, click the Content tab.
2. Select a Discussion Board, then a Forum from the folder structure.
3. Click a topic.
4. Click Properties (
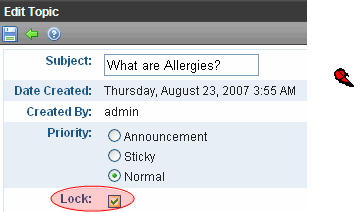
5. Click the Lock Topic check box.
Note: To unlock a topic, remove the check mark from the Lock Topic check box.
6. Click Save ( ).
).
Viewing a Topic
Note: To learn about viewing a topic from your Web site, see Using Discussion Boards on Your Web Site.
To view a topic from the Workarea, follow these steps.
1. In the Workarea, click the Content tab.
2. Select a Discussion Board, then select a Forum from the folder structure.
3. The Forum’s topics appear in the right frame. Click the one that you want to view.

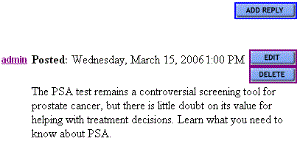
The View Topic screen displays each post within the topic. If a post is surrounded by a yellow border (illustrated below), it must be approved before it can appear on the Web site. Only users with Moderate permission can approve a post. See Also: Assigning Permissions to a Discussion Board
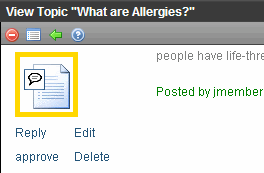
The following options may appear across the top of the screen, depending on your permissions.
|
Button |
Description |
For more information, see |
|
|
Delete topic and all of its posts |
|
|
|
View and edit the topic’s title and priority |
|
|
|
Return to previous screen |
|
Under each post is a set of options that you may be able to perform on any post, depending on your permissions and the status of the post.
If an option is underlined, you have authority to perform it. If not, you cannot. For example, if a post’s status is approved, the approve option is not underlined because it is already approved.
See Also:
Editing a Topic's Title
The only part of topic you can edit is its title.
1. In the Workarea, click the Content tab.
2. Select a Discussion Board, then select a Forum from the folder structure.
3. The Forum’s topics appear in the right frame. Click the one that you want to edit.
4. Click View Properties (
5. The Edit Topic screen appears. Modify the title as needed.
6. Click Save ( ).
).
Approving a Topic
A topic needs approval when a user without moderate permissions for the Forum adds a Topic. To approve a Topic, follow these steps.
1. In the Workarea, click the Content tab.
2. Select a Discussion Board, then select a Forum from the folder structure.
3. The Forum’s topics appear in the right frame. Click the one that you want to approve.
4. The View Topic screen appears.
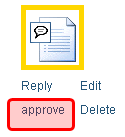
5. Click approve (shown in red box above).
6. The Topic is approved.
Deleting a Topic
You can delete any Topic. When you do, its posts are also deleted. Once deleted, they cannot be retrieved.
1. In the Workarea, click the Content tab.
2. Select a Discussion Board, then select a Forum from the folder structure.
3. The Forum’s topics appear in the right frame. Click the one that you want to delete.
4. The View Topic screen appears.
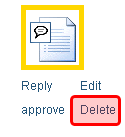
5. Click Delete (shown in red box above).
6. A confirmation message appears.
7. Click OK if you are sure you want to delete it.

